Delicious Homemade Strawberry Jam Recipe: A Sweet and Simple Guide

- Ingredients Required for Homemade Strawberry Jam
- Step-by-Step Instructions for Making Homemade Strawberry Jam
- 1. Prepare the Strawberries
- 2. Cook the Strawberries with Sugar
- 3. Test the Jam for Doneness
- 4. Jar and Seal the Homemade Strawberry Jam
- Tips and Tricks for Perfect Homemade Strawberry Jam
- Storage and Serving Suggestions for Homemade Strawberry Jam
Homemade strawberry jam is a delightful treat that captures the essence of fresh strawberries in a sweet and spreadable form. This classic preserve is a favorite among food enthusiasts for its vibrant color, intense flavor, and versatility in pairing with various dishes. Making your own strawberry jam allows you to control the ingredients, ensuring a natural and delicious product free from artificial additives. Whether enjoyed on toast, scones, or as a filling for pastries, homemade strawberry jam is sure to elevate any meal or snack with its homemade charm and fruity goodness.
Ingredients Required for Homemade Strawberry Jam
To make delicious homemade strawberry jam, you will need the following ingredients:
1. Fresh strawberries - 2 pounds (about 4 cups when crushed)
2. Granulated sugar - 4 cups
3. Lemon juice - 1/4 cup
4. Pectin (optional) - 1 package (if desired for a firmer jam)
5. Clean glass jars with lids for storing the jam
These simple ingredients are all you need to create a flavorful and sweet batch of homemade strawberry jam that can be enjoyed on toast, scones, or as a delightful topping for desserts.
Step-by-Step Instructions for Making Homemade Strawberry Jam
3. Step-by-Step Instructions for Making Homemade Strawberry Jam
3.1. Prepare the Strawberries:
Wash and hull fresh strawberries, then chop them into small pieces. In a large pot, combine the strawberries with sugar and let them sit for about an hour to macerate, releasing their natural juices.
3.2. Cook the Strawberries with Sugar:
Place the pot on the stove over medium heat, stirring occasionally until the sugar dissolves. Increase the heat to bring the mixture to a boil, then reduce it to a simmer. Skim off any foam that forms on top.
3.3. Test the Jam for Doneness:
After about 20-30 minutes of simmering, check if the jam has reached the desired consistency by using a cold plate test or checking if it sheets off a spoon. Once ready, remove from heat.
3.4. Jar and Seal the Homemade Strawberry Jam:
Carefully ladle the hot jam into sterilized jars, leaving some headspace at the top before sealing them tightly with lids and bands. Process in a water bath canner according to proper guidelines.
(Note: Always follow safe canning practices to prevent spoilage.)
1. Prepare the Strawberries
To begin making delicious homemade strawberry jam, start by washing and hulling fresh strawberries. Hulling involves removing the green leafy top of the berry and any hard white core around it. Once hulled, chop the strawberries into small pieces to help them break down more easily during cooking. For a smoother jam consistency, you can also mash the strawberries with a potato masher or blend them in a food processor before cooking. High-quality strawberries are essential for a flavorful jam, so choose ripe, sweet berries for the best results.
2. Cook the Strawberries with Sugar
To cook the strawberries with sugar, place the prepared strawberries in a large saucepan over medium heat. Add sugar to the strawberries and stir gently until the sugar dissolves. Bring the mixture to a boil, stirring occasionally to prevent sticking. Reduce the heat to low and let it simmer until the strawberries have softened and the mixture thickens, usually around 20-30 minutes. Skim off any foam that forms on the surface during cooking for a clearer jam. Stir occasionally to ensure even cooking and prevent burning.
3. Test the Jam for Doneness
To ensure that your homemade strawberry jam reaches the perfect consistency, you can perform a simple test to check if it has reached the desired level of doneness. One popular method is the "wrinkle test." Place a small amount of the hot jam on a chilled plate and let it cool for a few seconds. Then, push the jam with your finger. If it wrinkles and holds its shape, it is ready. If it is still runny, continue cooking and test again after a few minutes. This step is crucial to achieve that ideal gel-like texture that will set perfectly once cooled in the jars.
4. Jar and Seal the Homemade Strawberry Jam
To jar and seal the homemade strawberry jam, start by sterilizing your jars and lids in boiling water for about 10 minutes. Carefully remove them from the water using tongs and place them on a clean towel to dry. Next, using a funnel, carefully ladle the hot jam into the jars, leaving about 1/4 inch of headspace at the top. Wipe the rims of the jars with a clean, damp cloth to ensure a proper seal. Place the lids on top and screw on the bands until they are fingertip tight. Finally, process the jars in a boiling water bath for about 10 minutes to seal them properly. Allow the jars to cool completely before storing them in a cool, dark place.
Tips and Tricks for Perfect Homemade Strawberry Jam
1. Use fresh, ripe strawberries for the best flavor and set.
2. Add a splash of lemon juice to enhance the natural sweetness of the strawberries.
3. Skim off any foam that forms during cooking to ensure a clear jam.
4. Use a candy thermometer to accurately gauge the jam's temperature for proper setting.
5. Stir frequently while cooking to prevent burning and achieve an even consistency.
6. To test for doneness, place a small amount of jam on a chilled plate - it should gel and not run when tilted.
7. Sterilize jars properly before filling them with hot jam to prevent spoilage.
8. Store homemade strawberry jam in a cool, dark place for optimal preservation and flavor retention.
Storage and Serving Suggestions for Homemade Strawberry Jam
Once your homemade strawberry jam has cooled and sealed properly, it can be stored in a cool, dark place for up to one year. Once opened, store the jam in the refrigerator and consume within 3-4 weeks for optimal freshness.
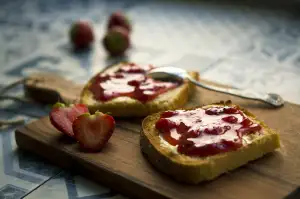
To serve the jam, simply spread it on toast, scones, or biscuits for a delicious breakfast or snack. It can also be used as a filling for cakes, pastries, or thumbprint cookies. Get creative and experiment with pairing the jam with cheeses like brie or goat cheese for a sweet and savory combination. Enjoy your homemade strawberry jam in various ways to savor its fresh and fruity flavors!
In conclusion, making homemade strawberry jam is a delightful and rewarding experience that allows you to enjoy the sweet taste of summer all year round. Whether spread on toast, mixed into yogurt, or used as a topping for desserts, this versatile jam is sure to elevate any dish. Remember to store your jam in a cool, dark place for optimal freshness.
Now that you have mastered the art of making homemade strawberry jam, it's time to savor the fruits of your labor. Indulge in the rich flavors and vibrant colors of your creation, and share it with friends and family to spread the joy of homemade goodness. So go ahead, grab a jar of your delicious homemade strawberry jam and let every bite transport you to a sunny strawberry field!
Published: 02. 04. 2024
Category: Recipes